Demystifying user authentication with Google in Electron
Let's see how we can implement browser-based authentication for an Electron App using Firebase Auth, Cloud Functions, Realtime Database, and React.


A few weeks back I got an interesting idea popped up in my mind, and soon I started working on its architectural design and flow. I wanted an application that can run in multiple desktop environments and I stumbled upon Electron. I knew this was gonna be easy for me because I've had experience with Web Applications before.
I decided to use Firebase Authentication to sign up and log in the users into the application, which is pretty straightforward to code in normal web applications. But Electron world had something else cooked up for me. Actually, it's not Electron it's Google. After I wrote the code for authentication inside the Electron App, I was not able to sign up and I was shown this Screen.
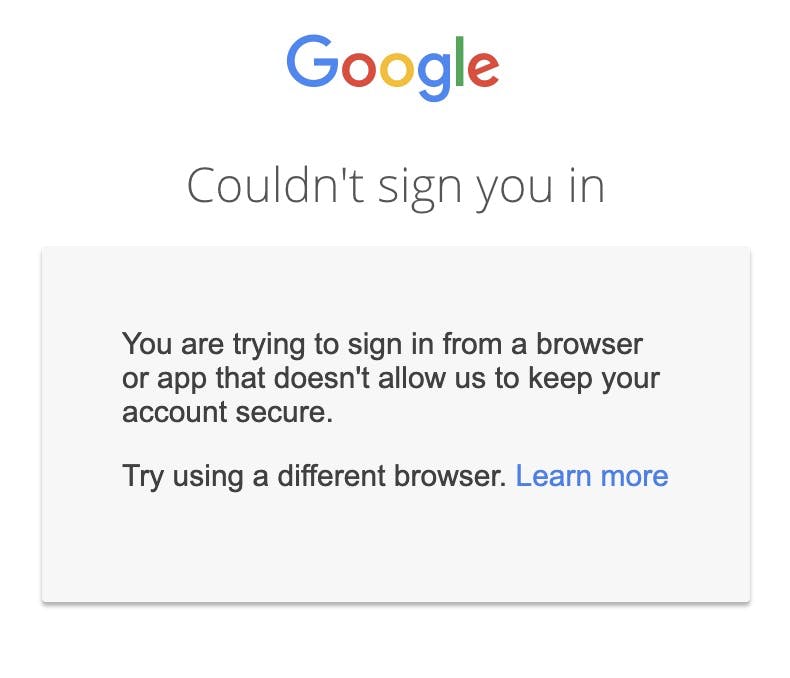
Upon reading and researching more on this obstacle I came to know that Google had deprecated the OAuth login for non-standard browsers and unfortunately Electron (which is interestingly Chromium-based) was also on the list.
So what now, how will the users sign up or login into my application? This was a total development blocker. Also, there was no good explanation available on the internet which talks about this problem in enough depth which can help people write their custom authentication logic.
After reading a lot of Firebase and Google APIs documentation, StackOverflow answers, blogs, and whatnot, I finally figured out a semi-custom auth architecture for my Electron App. So without further ado let's dive into the code.
What will we be using?
- Electron (obviously :p)
- Firebase Auth
- Firebase Cloud Functions
- React (you can skip and replace it whatever you like)
Basic Idea
TL;DR Refer to the diagram below directly if you want
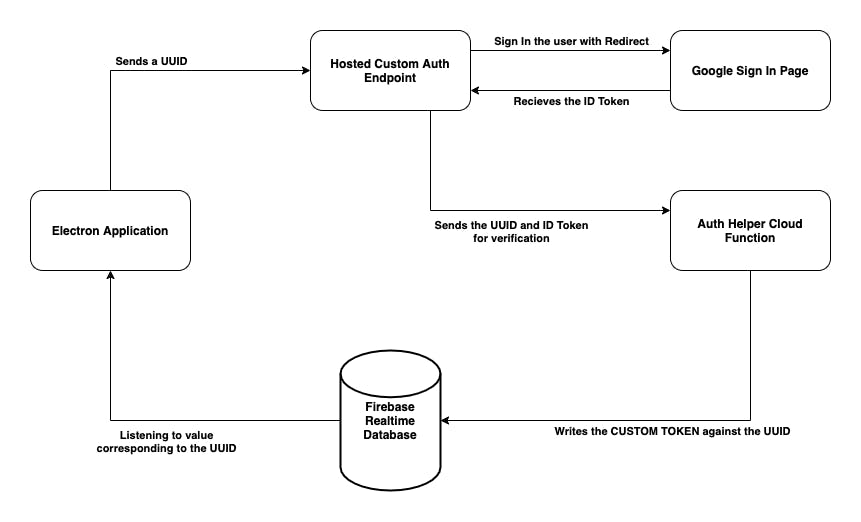
- Electron App will create a UUID for the login session and launch the hosted web endpoint passing the created UUID.
- We'll host a custom web endpoint that will be running in the user's default browser and let the user sign in using their Google Account on behalf of our Electron App.
- Once the user signs in, we'll grab the ID TOKEN returned by Firebase, and invoke the cloud function with the UUID, and the grabbed ID TOKEN.
- Firebase Cloud Function will verify the ID TOKEN using the Firebase Admin SDK.
- On successful verification, the function will create a custom firebase token and update it to the corresponding UUID node in the Firebase Realtime Database.
- Electron App will be listening to the value for the generated UUID in the first step and will receive the custom token, which can be used to authenticate the user using Firebase Auth.
Architecture Flow Diagram:
Electron App Renderer Side Code
As I will be using React, so I created on Component called SignInButton which handles UUID creation and sending it to the main process for opening the web-hosted custom endpoint on the user's default browser along with the UUID.
import React from "react";
import { v4 } from "uuid";
import firebase from "firebase";

const SignInButton = (): JSX.Element => {

  const handleSignIn = () => {
    // generating uuid
    const uuid = v4();

    // grabbing reference to the firebase realtime db document for the uuid
    const oneTimeUuidDocRef = firebase.database().ref(`onetime-uuids/${uuid}`);

    // applying listener to the reference document
    oneTimeUuidDocRef.on("value", async (snapshot) => {
      // getting the custom firebase token
      const authToken = snapshot.val();

      // use this credential accordingly
      const credential = await firebase.auth().signInWithCustomToken(authToken);

      /*
        Your rest auth code
      */
    });

    // invoking main process method to open user's default browser
    window.electronApi.ipcRenderer.invoke("initiate-login", uuid);
  };

  return (
    <div>
      <button onClick={handleSignIn}>Initiate Google Sign In</button>
    </div>
  );
};
export default SignInButton;
handleSignIn(): Called when user clicks on Sign In button inside our Electron App.
uuid: Random generated UUID unique for each Sign In request.
oneTimeUuidDocRef: Reference to Firebase Realtime Database document.
authToken: Custom token generated by Cloud Function, fetched from database document.
credential: Firebase Auth credentials after signing in via signInWithCustomToken().
window.electronApi.ipcRenderer: This comes from preload.ts script which helps us to call main process methods. This is a separate topic and we'll not be covering it in this blog, you can always read about it in Electron Documentation.
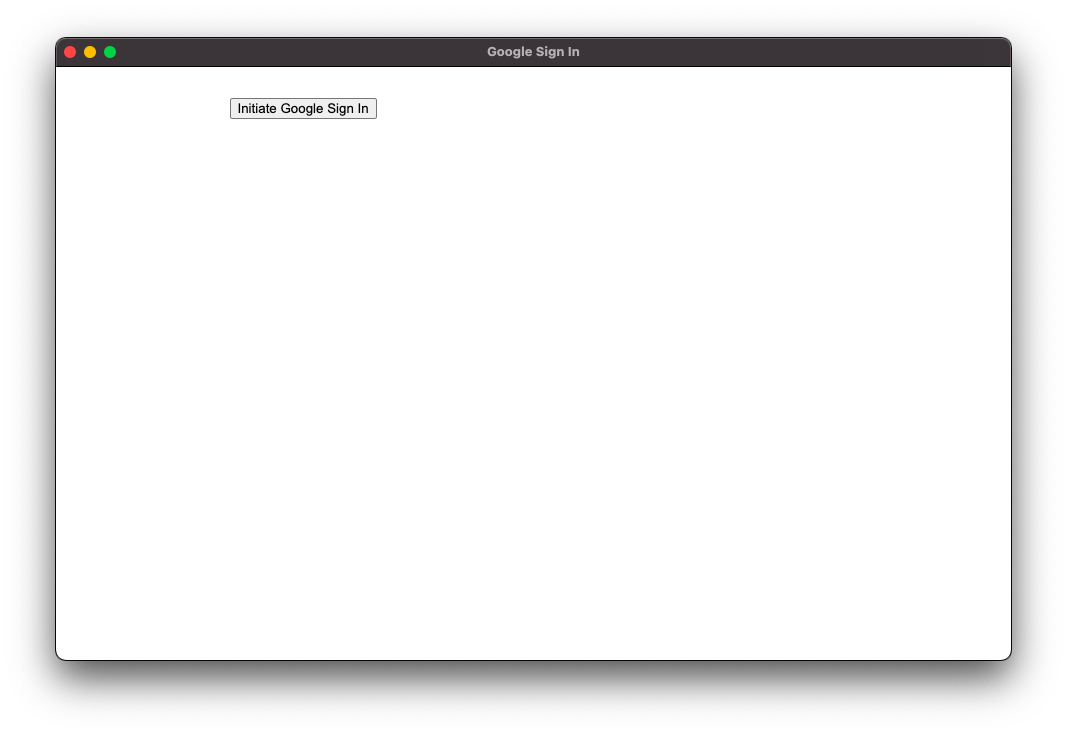
Refer to the below screenshot to know how this looks. Pretty basic.
Setting up Web Hosted Endpoint for Sign Up / Login to get ID TOKEN
Here for the explanation, I've created a React Web Application which has a route called https://{your_app_base_url}/gsigninhelper/${uuid}. I've created a component called GSignInHelper that gets rendered on calling this endpoint.
import React, { useEffect } from "react";
import firebase from "firebase";

const GSignInHelper = (props: any): JSX.Element => {

  // called immediatelly after component loads
  useEffect(() => {
    // boolean to keep only one request instance active and avoid multiple function triggers
    let didCancel = false;

    // setting up the provider for login [here Google Auth]
    const provider = new firebase.auth.GoogleAuthProvider();

    // wanted to use async inside useEffect
    const performGSignIn = async () => {
      // result object after user signs in
      const result = await firebase.auth().getRedirectResult();

      if (!didCancel && !result.user) {
        // if no result found, take user to Google Sign In page
        // happens only for the first time
        firebase.auth().signInWithRedirect(provider);
      } else {
        if (!result.user) {
          console.log("result.user is empty");
          return;
        }

        // UUID sent by Electron App
        const oneTimeToken: string = props.match.params.onetimetoken;

        // ID TOKEN
        const token = await result.user.getIdToken();

        // send UUID and ID TOKEN to cloud function
        // hosted firebase cloud function locally
        const response = await fetch(
          `http://localhost:5001/gsignin-electron/us-central1/gSignInFireFun?oneTimeToken=${oneTimeToken}&token=${token}`
        );
      }
    };

    // call the method
    performGSignIn();

    return () => {
      didCancel = true;
      console.log("cancelled..");
    };
  }, []);

  return <div>Signing you in please wait...</div>;
};

export default GSignInHelper;
provider: The provider via which we want to log in, in our case we are using Google Auth Provider.
result: Object which contains info about user and other sign-in creds like ID TOKEN once the user signs in.
performGSignIn(): Contains asynchronous logic to handle Sign In result object.
oneTimeToken: UUID sent by Electron App.
token: Id token from result object.
See the below GIF to get an idea, how this works. We get the token logged in our console.
Setting up Cloud Function to generate custom Firebase Token
In this example, we'll be using the local deployment for firebase functions, but you can also deploy to firebase anytime you want and use that, there will be no change in the working. This function will be receiving the UUID and the ID token from our React Web Application, and upon verifying the token, it will create a custom token that will be used by our Electron App to sign the user in. Let's see how it goes.
import * as functions from "firebase-functions";
import * as admin from "firebase-admin";
import * as corsLib from "cors";

const cors = corsLib({ origin: true });

/*
ADMIN SDK INITIALIZATIION CODE
*/

export const gSignInFireFun = functions.https.onRequest((request, response) => {
  // wrapping inside CORS
  cors(request, response, async () => {
    // getting query parameters from request object
    const query = request.query;

    // UUID from Electron App
    const oneTimeToken = query["oneTimeToken"];

    // ID TOKEN
    const token = query["token"] ?? "";

    // get decoded token if the token is valid
    const decodedToken = await admin.auth().verifyIdToken(token as string);

    // get the firebase user uid
    const uid = decodedToken.uid;

    // custom auth token
    const authToken = await admin.auth().createCustomToken(uid);

    // save the custom token to realtime database againsts the UUID
    await admin
      .database()
      .ref(`onetime-uuids/${oneTimeToken}`)
      .set(authToken, (err) => {
        console.log("error: ");
        console.log(err);
      });

    return response.status(200).send({
      token: authToken,
    });
  });
});
query: Query parameters from the request object.
oneTimeToken: UUID token from Electron App.
token: ID Token from our React Web Application.
decodedToken: This object contains the decoded claims if the token is validated successfully.
Let's see a complete sign-up flow
In the below gif, the sign-up is initiated by our Electron App, which opens our Web Hosted Custom Auth endpoint in the default browser, and finally, after signing in, the custom token is received by our Electron App as logged in the console.
Concluding thoughts
Sometimes we have to make hard decisions and travel a bit further to achieve something scalable and customizable enough, as we saw in this blog. This was my very first blog, hope you like it, if you have any suggestions to this blog content or unrelated, please feel free to contact me on Twitter or LinkedIn. I would love to discuss with you! :)
My Social Links
References
- Google Auth in Electron Blog by Vivek Nair on Pragli's blog
- StackOverflow
- Firebase and Google API documentation